This post will guide you on how to instal and configure arcobjects sdk for java.

After installing you’ll get the folder of DeveloperKit10.2
in C:\Program Files (x86)\ArcGIS\DeveloperKit10.2 or whatever your installed
directory is.
Now install Eclipse ide after Eclipse is
installed we have to import the arcobjects library or install it into eclipse.
Open Eclipse
Go to Help à Install New Software à
Click on the Add button

In Name Enter
Arcobjectslibrary à
click on Local button and select the path
C:\Program Files
(x86)\ArcGIS\DeveloperKit10.2\java\tools\eclipse_plugin\arcgis_update_site\arcobjects
Or whatever your
installed directory of ArcGIS is.

And click ok. It will
take some time and might give you error that arc gis palette cant be installed
So for that you have to install swing in Eclipse first before installing
arcobjects.
(Installing Swing and
other components is easy Just open eclipse à Help à Instal New Software à click on the drop down and select the site of your
eclipse version as in my case its kepler)


Under General Select
Swing designer and AWT designer and click install. Now it’ll take some time to
install.
After its installed try
again installing arcobjects and this time it’ll get installed. How ever if the
Pallete does not gets installed then no worries J
Okay now Lets get
started
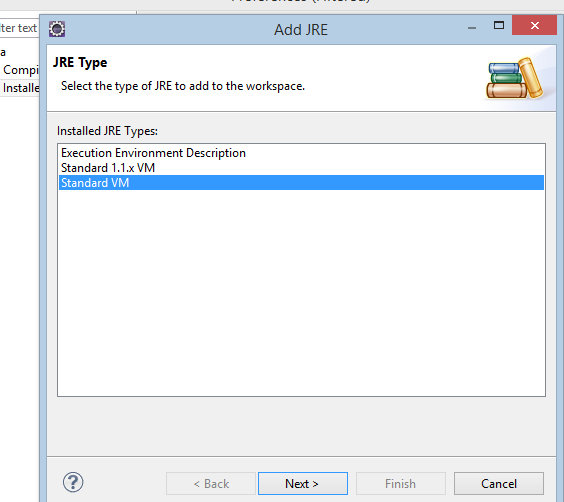
For ArcGIS 10.0 and
older versions I’ll recommend you to use 32 bit eclipse and 32 bit Java but for
ArcGIS 10.1 or newer it don’t really matter. I am using 10.2 ArcGIS and for
that I am using 64 bit eclipse and for Java I am using 64 bit but for eclipse in
general but for arc objects you require 32 bit I’ll tell you how you can manage
this.
We’ll start by running
a small sample to show you how to run it and also to help you cater the basic
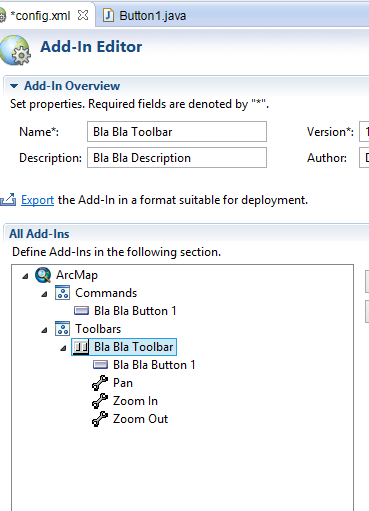
error which might occur. After that I am going to show you about how to make a
basic add in (toolbar button dockable window etc) in ArcObjects for ArcGIS.