To see the part 1 click here
In this post we'll develop Add in for ArcGIS.
We have configured the Eclipse project for Addin Development using Arcobjects and also configured the Java for it.
To configure Project for ArcObject see this post.
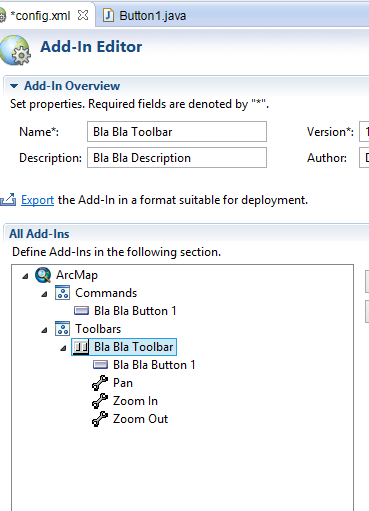
We have the project setup for this. you can see the config.xml file in its addin view (we'll talk about the views later). This view helps alot and makes sure the consistency and their are no errors in config file. Through this we can add different buttons, tools, meus, system tools, dockable window, palette etc and also can organize them.


http://resources.arcgis.com/en/help/arcobjects-java/concepts/engine/


After Adding Click on Toolbars and you'll see that it refreshes it self and you'll see the added system tools are shown under your toolbar.


Fill in the details


Class will be formed

Enter the following code.

Add the button to toolbar.

You can see the button added to toolbar
On Config.xml press export to add addin to ArcGIS. Now there are different methods to deploy your addin. I will follow the simple approach of direct deploying.
You can see the list of deploying options and details here
http://resources.arcgis.com/en/help/arcobjects-java/concepts/engine/#/How_to_deploy_your_add_in/0001000006sp000000/
You can give the path of C:\Users\Blabla\Documents\ArcGIS\AddIns\Desktop10.2 and press finish. A warning may appear press ok.


Click on the button and see the Hello World ;)

). This view helps alot and makes sure the consistency and their are no errors in config file. click here
ReplyDeleteThanks
Delete