Sunday, October 26, 2014

Develop Addin for ArcGIS Part 1

Develop Addin for ArcGIS Part 1

In this post we'll develop a basic addin for ArcGIS using ArcObjects SDK for Java.

Open Eclipse and Create new project 
File -> New -> Other


Then Select Esri Templates -> ArcGIS Extensions -> Desktop -> ArcMap Add In Project

Then On New Addin Project window  and click on Configure JRE (We are going to add ArcObjects compatible JRE to eclipse it comes installed with ArcGIS desktop after that we'll set the execution environment)

Click on Add 

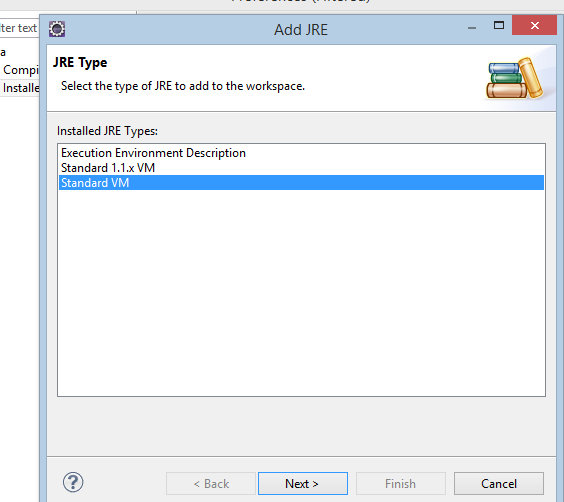
Select Standard VM
Click Next
Click on Directory and enter the name and following path as shown in figure
Click finish
Again click on configure JRE
Select installed JREs and click on execution Environments
Select Java SE 1.6 and Select the previously added JRE (Java ArcGIS)
Click Ok and Click Next
Click on libraries tab
Click Add libraries
Select ArcObjects Libraries 
(for adding Arcobjects library to eclipse see this tutorial)
Click finish
You can see the following on your screen. Everything is configured.

For next part see the next tutorial here

ArcObjects Development, Developing Stand Alone GIS Desktop Applications and Developing Addins for ArcGIS Desktop

ArcObjects Development, Developing Stand Alone GIS Desktop Applications and Developing Addins for ArcGIS

This post is going to discuss what things are required for Developing Stand Alone GIS desktop Applications or for developing Addins (plugins) for ArcGIS.

We'll be using ArcObjects SDK for Java. Esri also facilitates its user by giving a complete detailed resource for SDK. here are some of the important links

http://resources.arcgis.com/en/help/arcobjects-java/concepts/engine/

Why i am writing this post is because of the reason that for beginners this resource will not be of much help. This blog aims to help developers who are in their learning phase. So I'' tell you the basic start up tips for this arcobjects development.

Pre-requisites required :
Basic Understanding of Java
Eclipse IDE configured to be used for arcobject developments
To configure eclipse see this post

Outline:
1. How to check errors, how to enable console of ArcGIS, how to log errors.
3. Develop Stand alone GIS desktop application.
4. Coming Soon 

Saturday, May 17, 2014

ArcGIS Server Results Not showing up - (Problem caused by using specified extent of shapefile)

ArcGIS Server Results Not showing up - (Problem caused by using specified extent of shapefile)

While working on my Web Mapping Project i faced a problem, my buffer function which was functioning earlier started to show no data. And this was done after i republished the services (shapefiles) with the specified extent .

For Publishing shape file on specified extent 
see this Article

Or
To remove this warning 
Publish Shape File Warning 30003: Layer draws at all scale ranges
see this Article

In actual the problem occurred due to the reason that i had a shape file of country level and other 5 of city level, and i specified the extent of city level shape files using ArcGIS for Desktop and then published them, while in my buffer script i specified the extent of country level shape file, So the results from city level shape file were not showing up.

Tuesday, May 13, 2014

ArcGIS server - Google Map API

Overlay ArcGIS server Published Shape file on Google Maps

For beginners its really difficult to get things started i.e. How to overlay shape file on web mapping application using Google Map Api and ArcGIS server.


I assume you have published a shape file on ArcGIS server and You know a little bit about Google maps Api and if you dont know here you can learn this
Google Map Api (Basics) 

How to Publish Shape file on ArcGIS server

Now, First Open Note Pad ++ and make a basic html page containing a div and name it map_canvas

<!DOCTYPE html>
<html>
<head>
<title> ArcGIS Server - Google Map Api </title>

</head>

<body>
<div id="map_canvas" style="width:1000px;height:600px;"></div>
</body>

</html>

Now add two links

<!DOCTYPE html>
<html>
<head>
<title> ArcGIS Server - Google Map Api </title>

<script type="text/javascript" src="http://maps.google.com/maps/api/js?sensor=true"></script>
<script type="text/javascript" SRC="arcgislink.js"></script>


</head>

<body>
<div id="map_canvas" style="width:1000px;height:600px;"></div>
</body>

</html>

the first one is for adding Google Map api and the second one is for adding arcgis server library that you can find detail information here Open it and copy it and save it as arcgislink.js

Now,  write this script

<!DOCTYPE html>
<html>
<head>
<title> ArcGIS Server - Google Map Api </title>
<script type="text/javascript" src="http://maps.google.com/maps/api/js?sensor=true"></script>
<script type="text/javascript" SRC="arcgislink.js"></script>
<script type="text/javascript">
var dynamap;
function init() 
{
var mapprop = {
center : new google.maps.LatLng (33.716786,73.068171),
zoom : 14,
mapTypeId : google.maps.MapTypeId.ROADMAP
};
var map = new google.maps.Map(document.getElementById("map_canvas"),mapprop);


var url = 'http://localhost:6080/arcgis/rest/services/Test_Service/MapServer';
var dynamap = new gmaps.ags.MapOverlay(url);
dynamap.setMap(map);
}
google.maps.event.addDomListener(window, 'load', init);
</script>
</head>
<body>
<div id="map_canvas" style="width:1000px;height:600px;"></div>
</body>

</html>

Save it as index.html and Open it in browser You'll see a google map with your shapefile overlayed on it .

Sunday, May 11, 2014

How to Publish Shape file on ArcGIS server

How to Publish Shape file on ArcGIS server


This tutorial will guide you in publishing shape file on ArcGIS server. This is a basic introduction to ArcGIS server, i am going to publish a single shape file on ArcGIS server.

Well upto this point i assume that you have ArcGIS server installed and ready to use.
(For connecting ArcGIS server to ArcCatalog click here)

Talking about professional approach you need to open shape file from data base but for this tutorial a single basic shape fill will be enough.

Now, Open ArcGIS for Desktop (ArcMap) and Add shape file 


Go to file, Share As, and click Service

Click Publish a service


Click next, and Choose a connection 
" arcgis for local host_6080 (admin) "
and then rename the service

Choose "use existing folder" (if you want to publish on the same folder i.e. root)

Now, Service Editor will be opened, here you'll set the properties of service to be published. (e.g. Type of service, No of Instances, Description, Tags, etc. )

Click on Analyze, It'll show the warnings (ignore these warnings as this is for the basic purpose whereas for publishing for a project a professional purpose Remember Each and every warning is important) and now click publish.


Now click Publish.
Now open http://localhost:6080/arcgis/rest/services and You'll se your shape file there.

Shape file is published . Now for adding it to any API (Google Map Api use its address)
http://localhost:6080/arcgis/rest/services/Test_Service/MapServer


Tuesday, May 6, 2014

Esri ArcGIS Server, Publish Shape File Warning 30003: Layer draws at all scale ranges

Esri ArcGIS Server, Publish Shape File Warning 30003: Layer draws at all scale ranges


When Publishing shape files from ArcGIS server i received a warning "30003: Layer draws at all scale ranges". 
This post concerns about what this warning is and how to resolve this issue.

What is warning 30003 : Layers draws at all scale ranges, well working with maps you have probably come up with a problem that information at certain zoom level jumbles up and you have to zoom in and zoom in to perceive information


When you set information detail in dependence with zoom level you can have this warning removed.

Note: For Beginners, never ignore a warning while publishing ArcGIS server layers, its a tip :) 
You try to google the errors and you'll know what things are and how they work . . . 

If you publish a shape file whose extent is specified you MUST MUST MUST read this article.

How to Use Apache and PHP installed from Stack Builder (PostgreSQL)

How to Use Apache and PHP installed from Stack Builder (PostgreSQL)


Well, When i started working with PostgreSQL (POSTGIS) specially Apache and PHP, i faced a problem of deploying my application on local server. Normally when we work on Apache and PHP we normally use different pre-configured configurations like (WAMP, WAPP, XAMP etc) or we configure it manually, in doing both we deploy application in the "Apache" folder and inside apache folder we deploy it or copy (application) website into "htdocs" folder and then we open it using web browser by typing localhost/test.html (if we deploy (copy) test.html).
Whereas in case if you installed Apache and PHP using stack builder we have to deploy application in "www" folder. i.e. copy the website into www folder. 
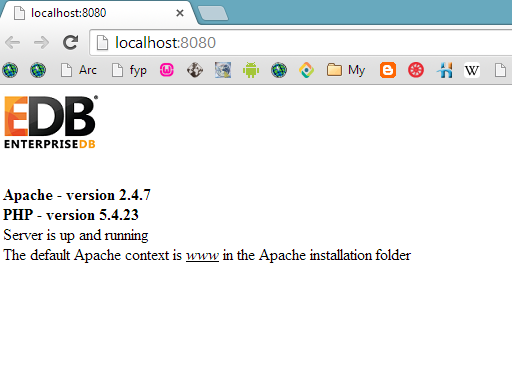
Also if you want to check the version of Apache and PHP open browser and type http://localhost:8080/
It'll open the default page and you can see the PHP and Apache version Also it'll make sure that server is up and running.
Also you can check it by going to start menu and click EnterpriseDB Apache PHP. It'll open the localhost default page.